Decomposing Chamber
Interface Design
Interface Design
Overview
We created a virtual testing chamber to teach middle schoolers about carbon cycles and decomposition. In this chamber, students can test plastic cups made from renewable resources and observe how they decompose under various environmental conditions.
I designed the main interaction interface for this set piece. This is essentially a laboratory simulation where students manipulate environmental factors and observe the results in real-time.
My Role: UI/UX Designer
Team: Interaction Designer/Art Director, Illustrators, Dev Lead
Timeline: 3 weeks
Team: Interaction Designer/Art Director, Illustrators, Dev Lead
Timeline: 3 weeks

The Challenge
The interaction designer handed me rough wireframes and a daunting list of requirements. The interface needed to:
1. Let students control humidity, aeration, and temperature at three intensity levels each
2. Display a large viewport for watching decomposition animations
3. Show an animated timer spanning both 1 year and 10 years
4. Track decomposition percentage with a clear path to 100%
5. Display three types of microorganisms that multiply or die based on conditions
6. Include CO₂ and methane meters as environmental feedback
7. Allow unlimited testing and experimentation
Oh, and it all needed to feel like a piece of high-tech laboratory equipment that middle schoolers would actually want to use.
Design Direction
The course lives within a larger product series with a sci-fi aesthetic (think video game UI but for science education). This specific course needed to feel clean and bright, inspired by plastic's shiny appearance, while maintaining that sci-fi engagement factor.
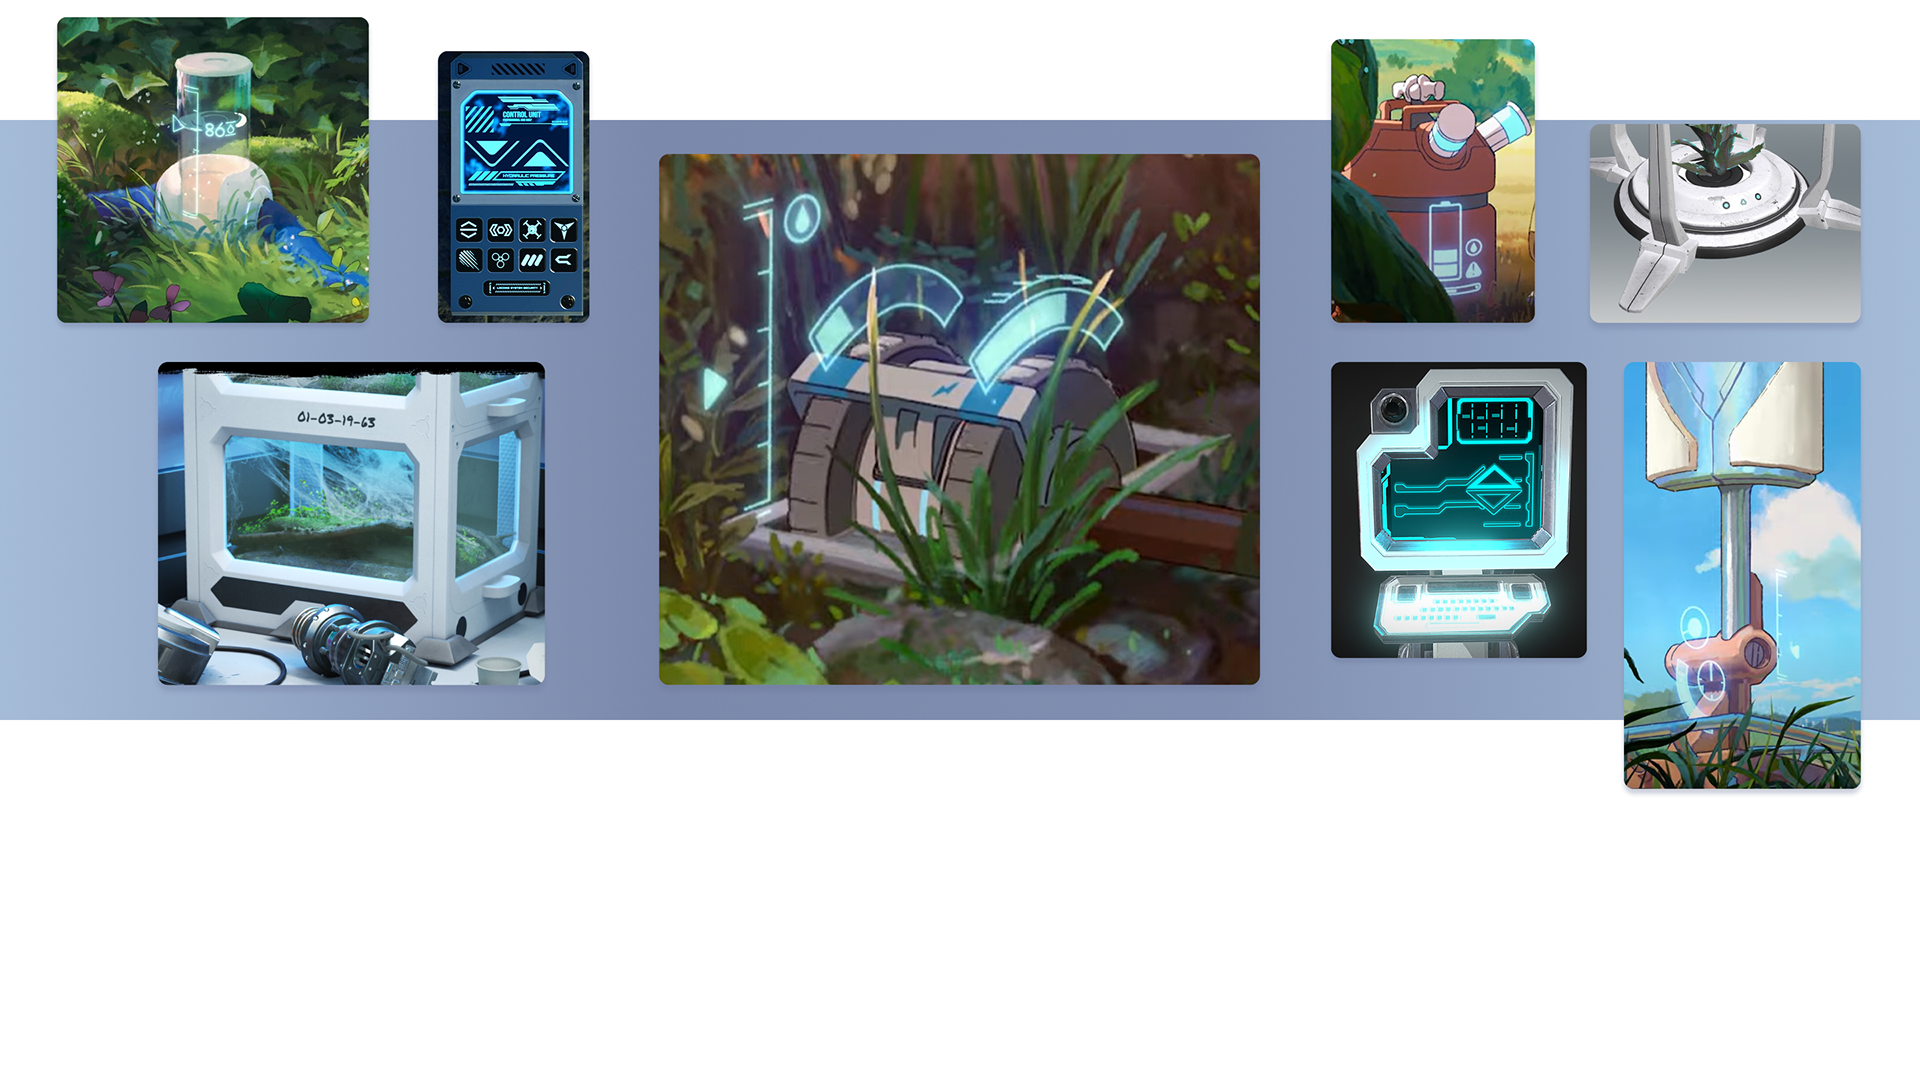
I pulled visual research from the solar-punk aesthetic: clean floating interfaces, monochrome schemes, crisp white machinery. The goal was diegetic UI, making students feel like they're operating actual lab equipment in a pristine research facility. The art director and I aligned on this direction early in the production pipeline, which freed up the illustrators to work in the same visual style concurrently with other course assets.
The Layout Problem
Here's what I was wrestling with: the testing chamber needed to dominate the screen, but I also had to fit three microorganism displays, a timer, a decomposition bar, two gas meters, and our mascot character, who delivers feedback in a speech bubble.
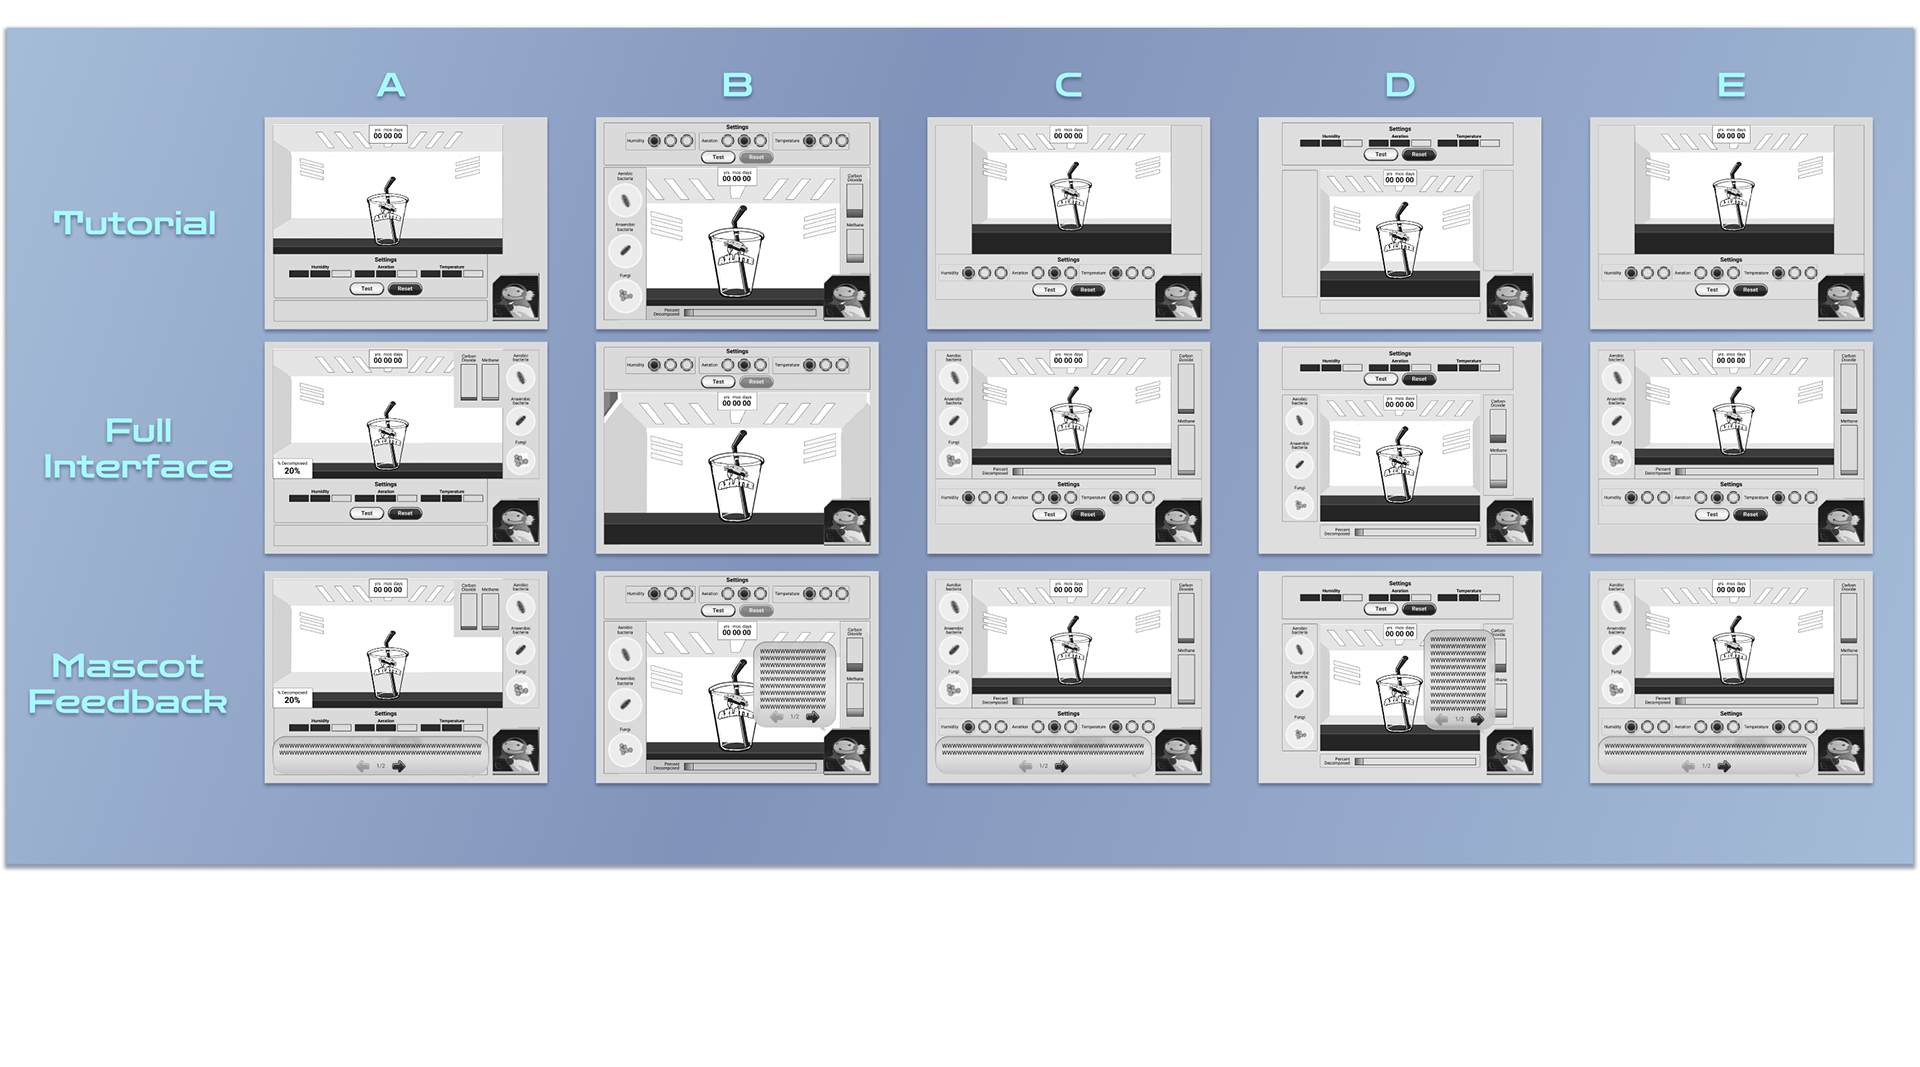
Through digital sketches, I tested various configurations using placeholder components from our design library. The winning layout ended up being symmetrical, with the chamber centered and the mascot speech bubble spanning the bottom width, creating a balanced composition that didn't feel cluttered.
Testing the Controls
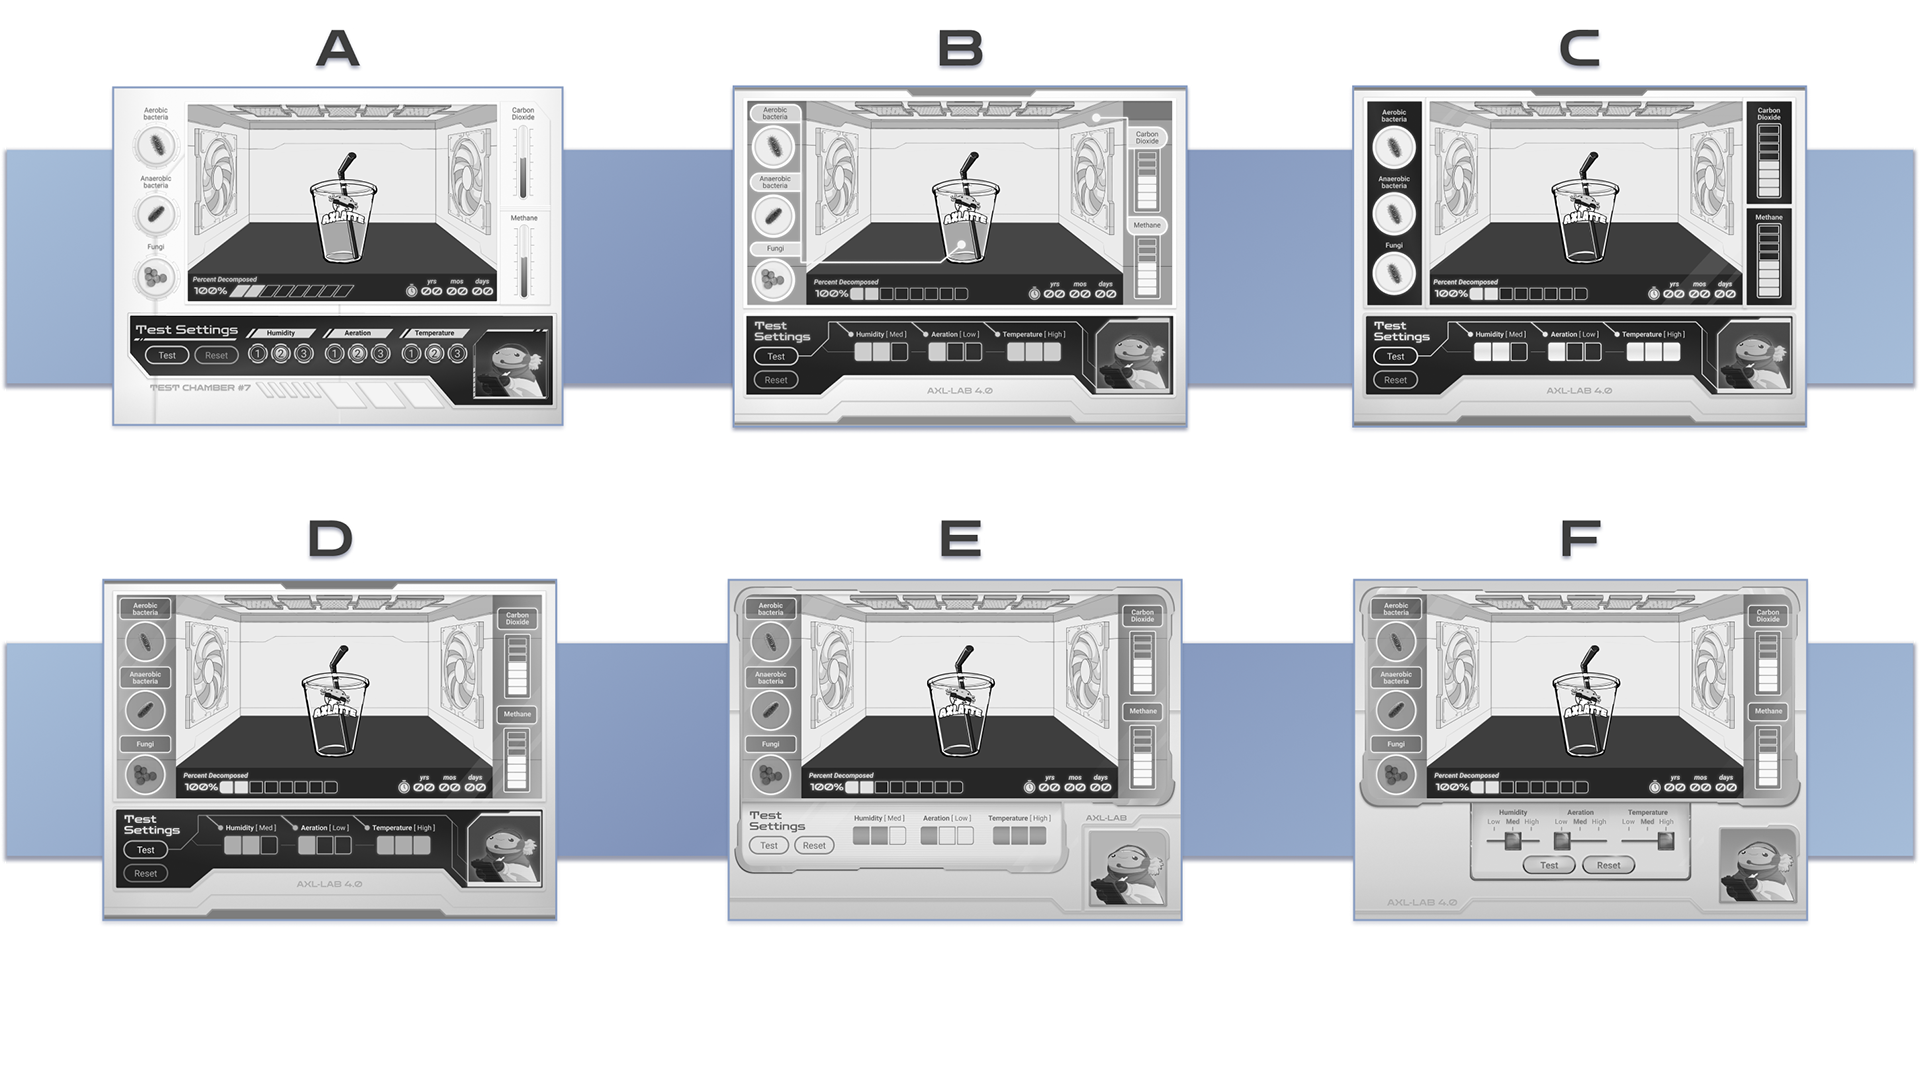
For the low-fi mockups, I explored different approaches for the chamber setting buttons (humidity, aeration, temperature). This is where things got interesting.
What didn't work:
◾Knob designs looked intuitive but functioned on clicks, not dragging, due to technical constraints. Users expected sliders. Creating cognitive dissonance.
◾Numeric labels (1, 2, 3) made testers question what the numbers meant quantitatively.
What worked:
◾Simple, rounded square buttons labeled Low/Med/High. Zero negative feedback. Sometimes the obvious answer is the right one.
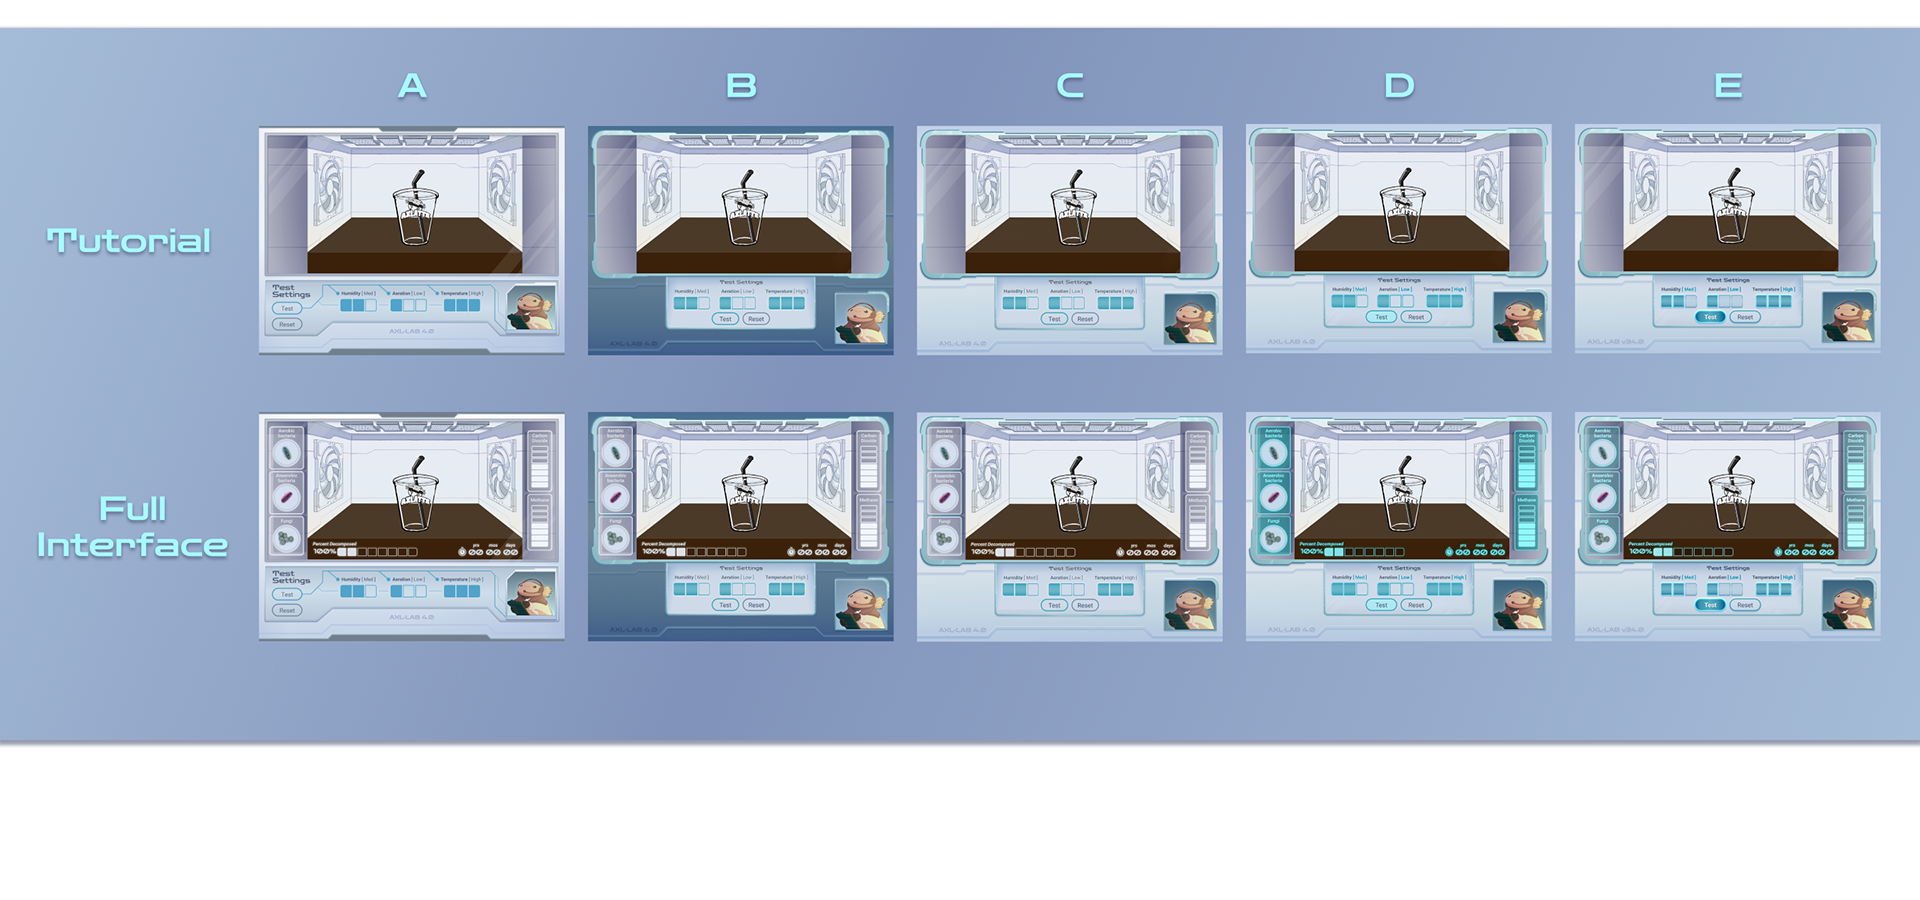
The Color Challenge
Bringing in color to hit that solar-punk aesthetic proved trickier than expected. The design needed pops of teal without becoming oversaturated, maintaining that clean laboratory feel while still being visually engaging for middle schoolers.
Several rounds of value adjustments and saturation pullbacks later, we landed on a design that balanced large amounts of visual feedback without overwhelming the interface.
High-fi testing showed the scaling worked well and the controls were intuitive. But we hit a readability issue with two microorganism animations labeled "aerobic" and "anaerobic." Testers kept confusing them.
First attempt: Color-coded containers to match the microbe colors in the animations. But this approach broke the entire aesthetic.
Solution: I designed unique icons for each microorganism type. This not only solved the differentiation problem but also gave us reusable assets for teaching the difference between aerobic and anaerobic microbes elsewhere in the course. We love accidental bonuses!
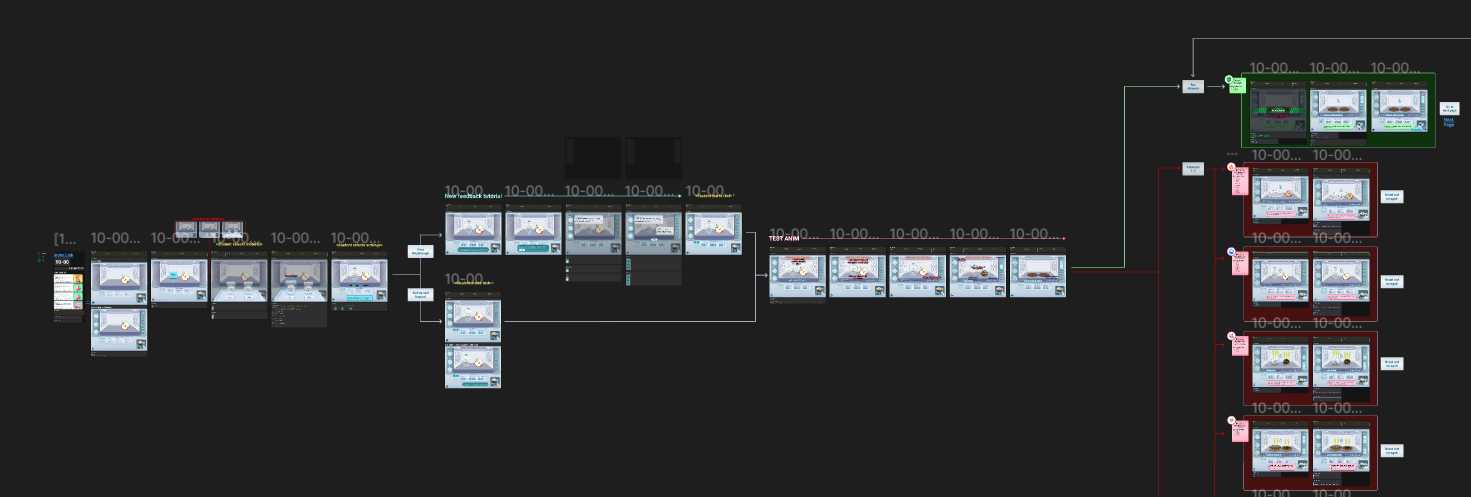
Flow Testing & Iteration
The overall interaction flow tested smoothly. Earlier tutorials handled onboarding well, and brief instructions at the start of the final experiment addressed concerns about evaluating multiple feedback elements simultaneously.
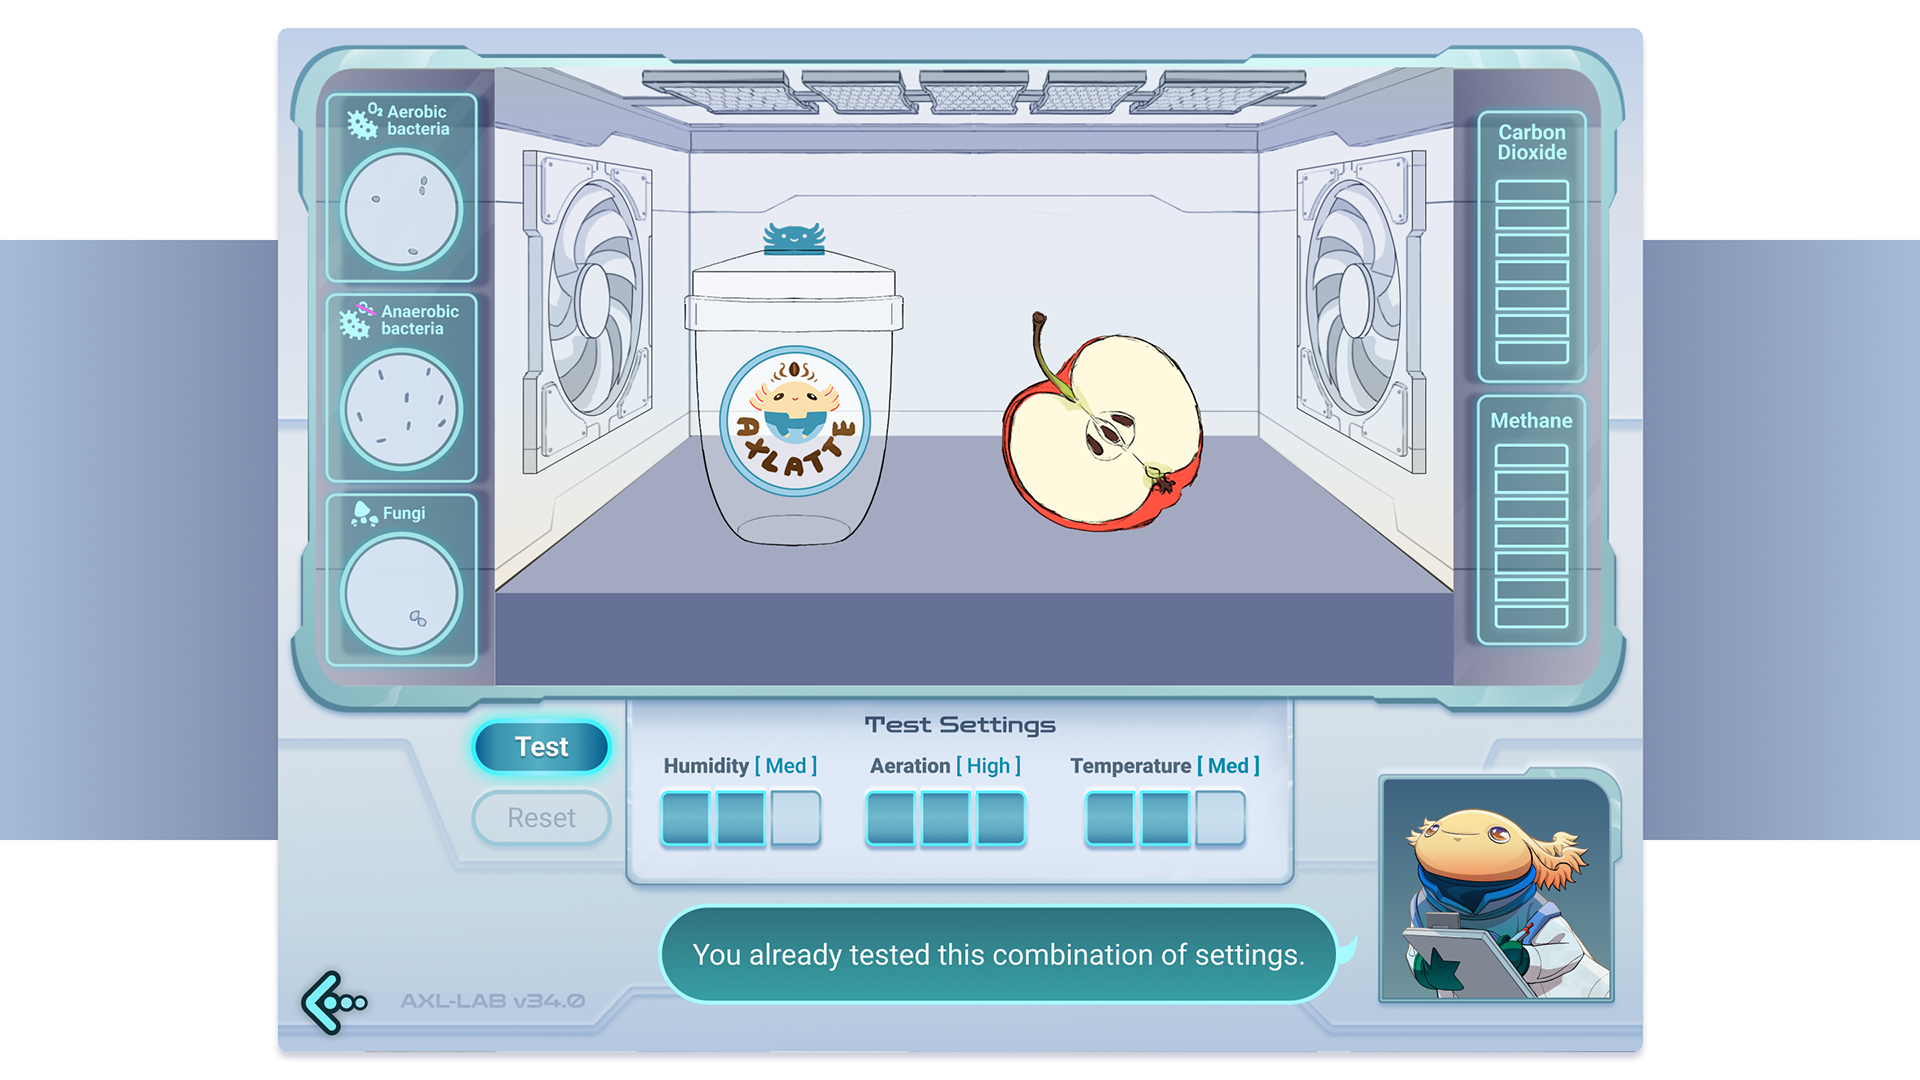
One legitimate concern emerged. Students wanted to retest conditions but couldn't remember what they'd already tried. Technical constraints prevented us from displaying a history of past tests. Our solution was to have the mascot warn students when they've queued a combination they've already tested, while still letting them run it again if they want. This prevented circular experimentation without blocking intentional retesting.
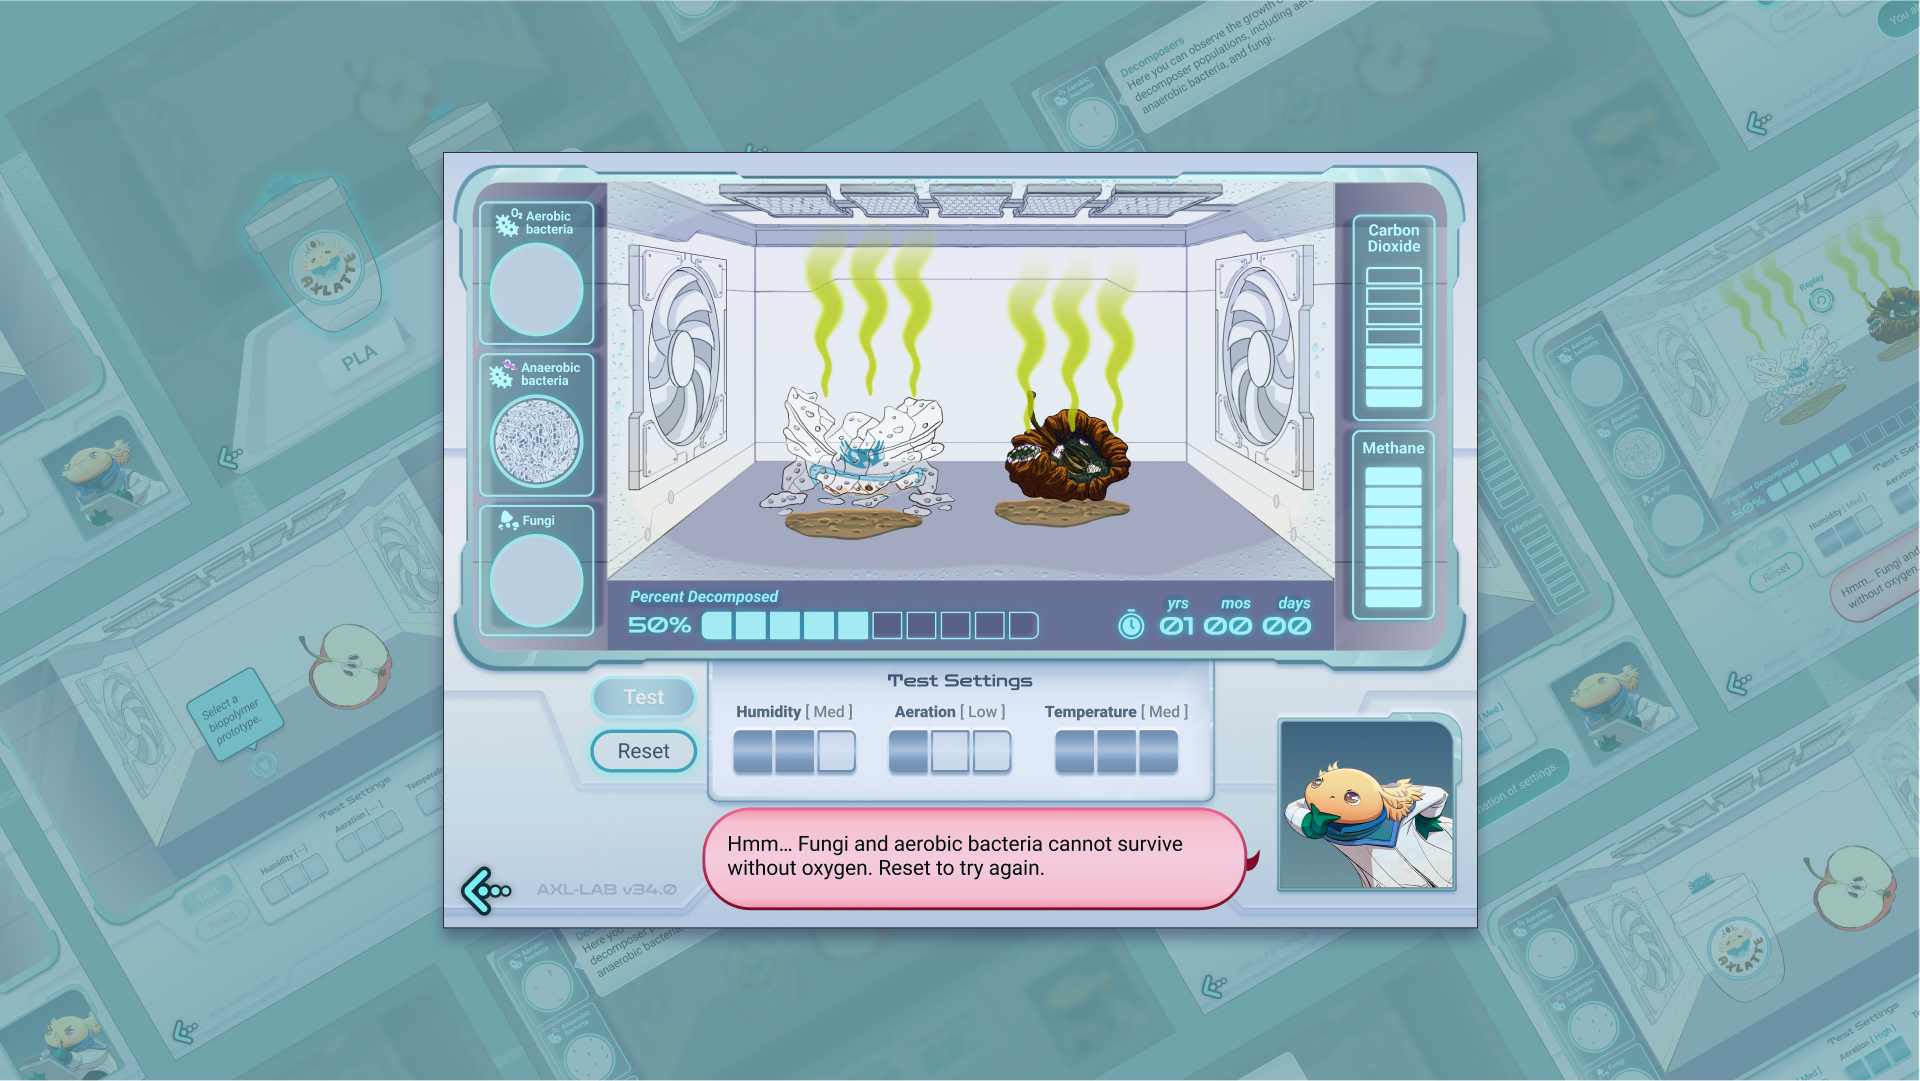
Results
The final interface tested well in being intuitive for inputting settings and evaluating feedback, while delivering on the course's design aesthetic. Students could experiment freely with environmental conditions, observe real-time feedback across multiple indicators, and understand decomposition concepts through hands-on testing.
The design maintained visual hierarchy despite the density of information, keeping the testing chamber as the focal point while ensuring all feedback elements remained readable.
Key Takeaways
◾Sometimes the most intuitive solution is also the simplest one (Low/Med/High buttons vs. fancy knobs)
◾When color-coding fails, iconography can save you and create unexpected value elsewhere
◾Working within technical constraints requires creative problem-solving with the tools you have (mascot warnings vs. test history)
◾Balancing aesthetic goals with usability for your actual audience (middle schoolers) requires constant testing and iteration
See the design in action!